The Thruster
A high-performance personal thruster module — engineered for maximum thrust, mounted on a proper desk clamp. The print that went viral, now yours to download free.
It started as a weekend build and a bit of a joke. Then the reel blew up, everyone wanted the files — so here they are, no strings, completely free.
Nine parts, one smooth operator. The Thruster prints on any FDM machine and goes together into one compact, satisfyingly smooth, surprisingly powerful little unit. There's a motor housing, a propeller duct, a mounting bracket with a proper desk clamp, and all the bolts and standoffs you need to keep everything locked down and rattle-free while it does its thing.
Engineered for thrust. The duct channels everything exactly where you want it, the clamp keeps it steady on any edge, and the whole thing comes apart for easy cleaning. What you do with all that thrust? That's entirely between you and your print bed.
Read this first — what it actually is 😏
Let's be honest: this is a machine printed purely for fun — a cheeky motorized novelty, not a precision instrument. To actually put it to work you'll need a handheld silicone masturbator sleeve, around 60 mm in diameter. Run a strip of double-sided tape around the inner bore edges of the housing, slide the silicone sleeve in until it sits snug, switch on the motor — and that's it. The thruster does the thrusting.
18+ only. Built as a meme, for fun — use sensibly, keep it clean, and run the motor at a comfortable voltage.
What's in the pack
| Part | What it does | File |
|---|---|---|
| Motor Housing | The main barrel — print it standing up for the smoothest finish. | 559 KB ↓ |
| Propeller Duct | Channels everything exactly where you want it. | 204 KB ↓ |
| Mounting Bracket | The arm that holds it all at the perfect angle. | 437 KB ↓ |
| Mount Bolt | Threaded mount bolt — keeps things firmly in place. | 1038 KB ↓ |
| Housing Clamp | Locks the housing down, rattle-free. | 81 KB ↓ |
| Mounting Strap | Holds steady under load. | 84 KB ↓ |
| Rear End Cap | Seals the back end. Comes apart for easy cleaning. | 239 KB ↓ |
| Standoff Post | Keeps the spacing just right. | 100 KB ↓ |
| Locating Key | Tiny part, big job — everything lines up first time. | 1 KB ↓ |
Grab the whole set in one ZIP above, or pull individual parts here. The ZIP also includes the full editable STEP file for remixing in any CAD tool.
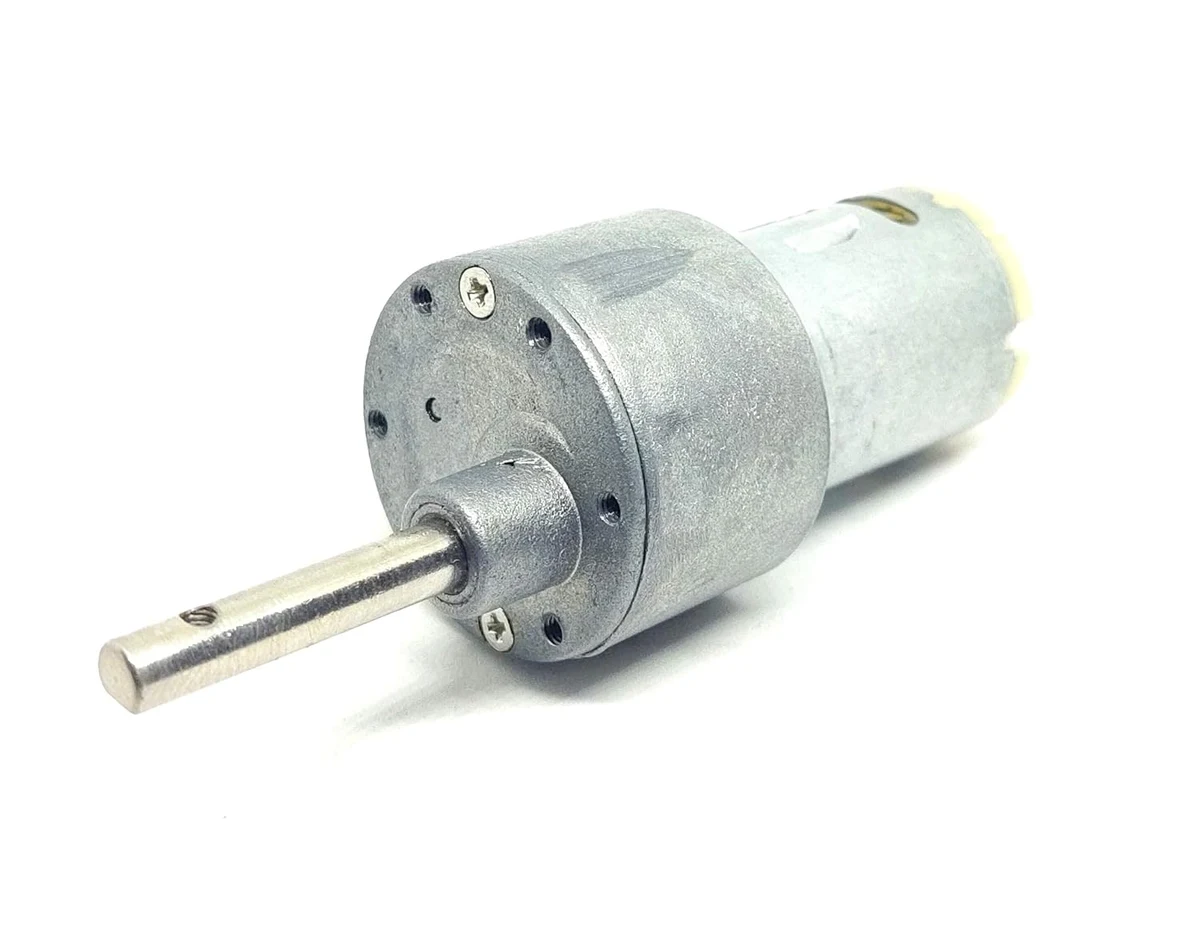
The motor that drives it
The printed parts give it the body — the motor gives it the go. The housing is modeled around a standard 12 V high-torque metal-geared DC motor with a 37 mm gearbox. Print at 100% scale and the motor seats snugly; if yours has a different gearbox diameter, just scale the housing to match.
Electrical
- Voltage
- 6–18 V DC (12 V nominal)
- Speed
- 60 RPM @ 12 V
- Torque
- 38 kg·cm stall (≈3.7 N·m)
- No-load current
- ~800 mA
- Stall current
- up to ~7.5 A
Mechanical & fit
- Gearbox Ø
- 37 mm (metal gears)
- Motor body Ø
- 28.5 mm
- Length (excl. shaft)
- 63 mm
- Shaft
- 6 mm D-shaft, 30 mm, M3 end
- Weight
- ~180 g
Tip: the speed scales with voltage — run it at 6 V for a gentle ~30 RPM, 12 V for the rated 60 RPM, or push 18 V for ~90 RPM. A simple PWM speed controller lets you dial in exactly the pace you want.
Recommended print settings
Total print is a few hours and roughly 90–110 g of filament across all nine parts. Sand the mating surfaces lightly and everything slides together with a satisfying click.
Putting it together
- Press your 12 V geared motor into the motor housing — the 37 mm gearbox seats against the front face.
- Bond the housing clamp to the mounting bracket with a few drops of super glue (cyanoacrylate) and let it cure — this locks the cradle solid.
- Clamp the mounting bracket to any desk edge up to ~40 mm thick using the mount bolt.
- Drop the loaded motor housing into the cradle and lock it with the housing clamp + strap.
- Seat the propeller duct on the shaft, cap the rear, and set the standoffs.
- The locating key keeps it all aligned — push it home, wire up your power, and you're ready to go.
Printed one? Tag @creative3dp — we want to see it run.